
As preppers, we’re always looking for ways to re-use, repurpose and get creative with what we have on hand so in that spirit, we’ve put together a list of common household multipurpose items to use when surviving an economic crisis. Don’t wait til the economy collapses, though.
These items are great to use now because they’re also environmentally friendly!
Duct Tape
I know that we preach the value of duct tape all the time, but it really can’t be overstated as an invaluable multi-use item that every prepper should have. Just a few things that you can use duct tape for include:
- Patching tarps, rain gear, shoes and tents
- Splint a broken tent pole (or a leg!)
- Sealing broken windows
- Sealing leaky window sills and frames
- Binding wounds
- Marking trails
- Making a cup in a pinch
- Making easy fly strips
- Making a sling
- Emergency vehicle repair (hoses, etc.)
Salt
According to the Salt Institute, there are more than 14,000 uses for salt; as a matter of fact, Roman soldiers were actually PAID in it! That’s what we call a serious multi-use item and the fact that it’s an abundant, cheap mineral makes it even better.
In addition to tasting good, salt also acts as an antibacterial, antimicrobial and anti-inflammatory agent when used topically and can be used for a number of household cleaning and disinfecting purposes.
Here are just a few of the 14,000 uses!
- Salt melts ice
- Use it to preserve foods, especially meats
- Tenderize tough cuts of meat
- If you forage for nuts, soaking them in a salt water solution for several hours will make them easier to open
- A pinch of salt in coffee reduces bitterness
- A pinch of salt will keep milk fresh longer
- Gargle or rinse with salt to help a sore throat, canker sore or toothache
- Salt makes water boil at a higher temperature, reducing cooking time and saving fuel
- Puts out grease fires
- Combine with baking soda to make toothpaste
- Use with some honey or water to exfoliate
- Combine with baking soda to make an abrasive, stain-removing cleanser
- Wash your hands with it to get rid of oniony or garlicy smells
- Use a salt bath to draw infection or swelling out of minor wounds or aching muscles
- Relieve the itch or pain from bug bites and stings
- Soak candles in a salt solution for a few hours and they won’t drip when burned
- Line doorways, windowsills and shelves with salt to keep ants away
- Salt water kills weeds, including poison ivy
- Toss a tablespoon or so into wet shoes to help dry them faster and deodorize them
- A sprinkle of salt helps soak up grease and scrub off particles when cleaning your iron skillet
- If you’re air-drying your clothes in the winter, add a handful of salt to your final rinse to keep them from freezing on the line.
- Add a pinch to your jams and jellies. It helps the gelatin set quicker
- Salt mixed with alcohol (1:4) is great to remove grease stains from clothes
Bleach
 Bleach
can be used to kill disease-causing bacteria, fungi and viruses and it
takes very little to be; a 10:1 bleach/water solution will kill just
about anything, including the AIDS and hepatitis viruses. Since disease
is going to be a huge issue in a post-SHTF society, an ounce of
prevention is worth a pound of cure.
Bleach
can be used to kill disease-causing bacteria, fungi and viruses and it
takes very little to be; a 10:1 bleach/water solution will kill just
about anything, including the AIDS and hepatitis viruses. Since disease
is going to be a huge issue in a post-SHTF society, an ounce of
prevention is worth a pound of cure.You can also use it to sanitize drinking water. Add ¼ teaspoon per gallon of clear water or ½ teaspoon per gallon of cloudy (but filtered) water. Let it stand for 30 minutes prior to drinking.
Vinegar
First, let’s differentiate between white vinegar and apple cider vinegar. White vinegar is a fermentation of dilute ethyl alcohol. Apple cider vinegar is a natural product made from fermented apples/juice. Both have awesome cleansing properties but apple cider vinegar is also has medicinal properties.
Keeping both on hand would be ideal but if you have to choose one or the other to stockpile, we would suggest going with apple cider vinegar, hands down.
Here are just a few uses for vinegar:
- The acetic acid in vinegar tenderizes meat
- Dabbing some vinegar onto a fish will help the scales come off easier
- Preserve eggs by pickling them in vinegar. White works best because of the distinctive flavor or apple cider, but either will do
- Spritz on your skin to relieve eczema and other skin conditions
- Kills bacteria on your face that causes acne
- Clean and disinfect counters, windows and other hard surfaces
- AC vinegar helps with digestion and helps soothe heartburn and UTIs
- Mix with baking soda to clean and disinfect water bottles and containers
- Helps reduce night sweats associated with menopause
- Nutrition: ACV has lots of minerals and enzymes, including calcium and potassium
- Mix with baking soda and spray on shelves and in dark corners to deter mice and rats
- Mix with water to relieve painful sunburn
- Kills mildew
- Antibiotic properties help cuts and scrapes heal faster and with less scarring
- Kills the itch and odor associated with yeast infection. Drink an ounce or so in the morning to fight the yeast internally and swab/douche with diluted vinegar to stop the itching and kill the yeast externally
- Kills dandruff
- Antibacterial properties help kill bugs that cause a sore throat when you gargle with it
Acts as an antibacterial, antifungal and antiviral for wounds, first aid tools and surfaces. It’s also extremely flammable and can be used to make Sterno cans to cook with. If possible, go with 99% if you’re going to use it to burn instead of the 70% that most people grab.
Chalk
Can be used to mark paths, deter ants and insects if you put a line of it in your doorway, or even as a component to make biofuel.
Zip Ties
The uses are endless. To reuse them just slide a razor blade or small screwdriver into the teeth at the lock and pull the tab back out.
Used Tea Bags
Great for starting fires. Just dry them out then store in an airtight container.
Honey
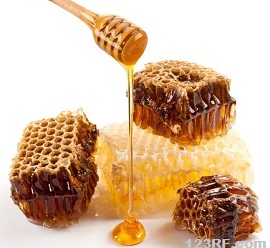 Antibacterial,
antiseptic and antifungal. Use as a base for salves or to relieve the
pain of beestings. Also high in nutrients, including vital minerals.
Honey is also great for curing allergies if taken orally every day. Pure local honey should most certainly be a part of your stockpile.
Antibacterial,
antiseptic and antifungal. Use as a base for salves or to relieve the
pain of beestings. Also high in nutrients, including vital minerals.
Honey is also great for curing allergies if taken orally every day. Pure local honey should most certainly be a part of your stockpile.Cayenne Pepper
Not only does it make food taste great, cayenne powder helps stop bleeding and is good for various ailments including various digestive disorders. It’s also a natural anti-inflammatory if eaten regularly.
Newspapers
Don’t toss out those Sunday papers after you get the coupons out of them! Newspaper can be used for toilet paper, insulation, starting fires or making a semi-bulletproof wall.
Tarp
In case of economic crisis, keeping warm is going to be an issue. Use a tarp to isolate areas of the house off to keep heat localized. You can, of course, also use tarps for catching water, building shelter, patching damaged roofs, keeping warm, or a million other uses. They’re just handy to have.
Eggshells
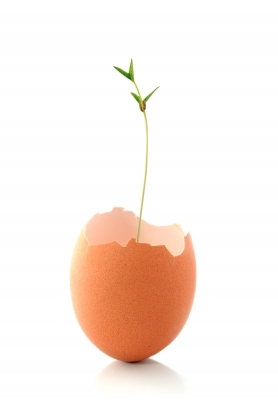 Packed full of calcium and protein, eggshells have several uses.
You can feed them to your chickens for better egg production. Store
them in a jar of water then pour the water on your plants. It provides
excellent nutrients to the soil.
Packed full of calcium and protein, eggshells have several uses.
You can feed them to your chickens for better egg production. Store
them in a jar of water then pour the water on your plants. It provides
excellent nutrients to the soil.Eggshells are also good as an abrasive to clean iron skillets or other surfaces with. Bake them and grind them into a powder. Add a tablespoon to your breakfast to boost your calcium intake. If you want to get really creative, half-shells are great to use to start your seeds in.
Baking Soda
This stuff is amazing. We’ve already mentioned several ways to use it with other ingredients but it makes a great base for a paste for cleaning or for many medical uses. You can take a teaspoon of it for heartburn in a pinch (be careful, chronic use can make ulcers worse). It kills fungi and yeast and soaks up moisture from your shoes. Scrub your veggies with them, or use it as a base for deodorant or toothpaste. The list goes on.
These are just a few of the top items that we found that are cheap and easy to stockpile. Because they’re so multi-functional, you should make every effort to stockpile each of them!
This article has been written by Theresa Crouse for Survivopedia..


